MCP Access
Sign in as a proxy admin and register your MCP server.
Give a team access
Open Teams, select the team, then open Settings → Edit Settings. Under MCP Servers / Access Groups, select the servers the team needs. Turn off any tools the team must not use, then click Save Changes.
For a new team, use Create Team → MCP Settings → Allowed MCP Servers.
Give an application access
Open Virtual Keys → + Create New Key. Choose the team and give the key a name. Expand MCP Settings, then select the application's servers under Allowed MCP Servers. Turn off unneeded tools and click Create Key. For production applications, use a service account key.
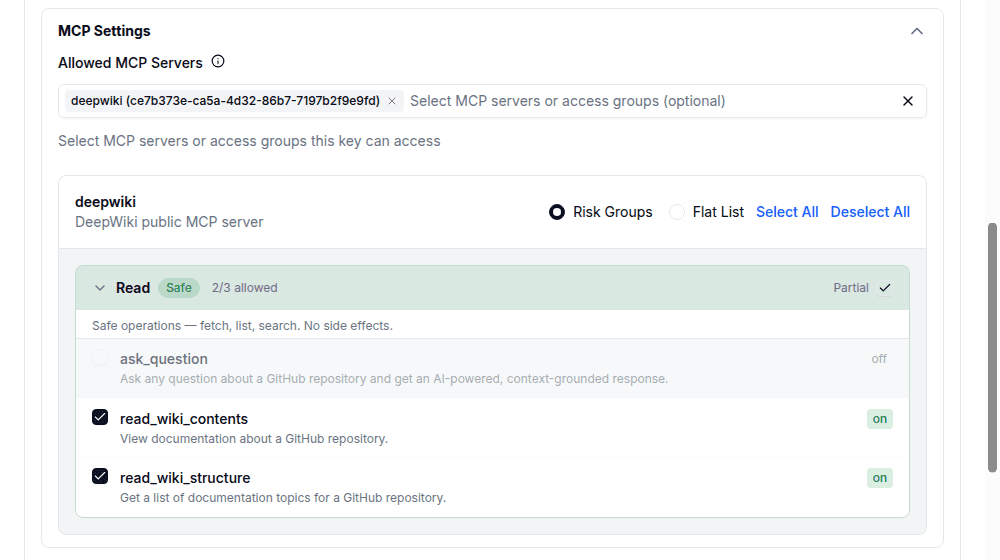
When servers are selected directly, both the key and team must allow the server. Access groups can grant additional servers.
By default, a key with no MCP selection inherits its team's access. You can require each key to define its own MCP access.
Manage access through your IdP
Sync teams with SCIM and assign MCP permissions. Applications can authenticate with IdP tokens through JWT key mapping.
Test access
Set LITELLM_PROXY_URL to your gateway URL and LITELLM_API_KEY to the application's static API credential or mapped JWT. List its allowed tools:
curl "$LITELLM_PROXY_URL/mcp-rest/tools/list" \
  -H "Authorization: Bearer $LITELLM_API_KEY"
Check the returned tools, then connect your MCP client.
Change or remove access
Open the key's Settings → Edit Settings, update MCP Servers / Access Groups and its tool selection, then save. To block all MCP access for the key, choose No MCP Servers. Clearing the selection can restore inherited access.