Quick Start
Create keys, track spend, add models without worrying about the config / CRUD endpoints.
Quick Start
- Requires proxy master key to be set
- Requires db connected
Follow setup
1. Start the proxy
litellm --config /path/to/config.yaml

#INFO: Proxy running on http://0.0.0.0:4000
2. Go to UI
http://0.0.0.0:4000/ui # <proxy_base_url>/ui
3. Get Admin UI Link on Swagger
Your Proxy Swagger is available on the root of the Proxy: e.g.: http://localhost:4000/

4. Change default username + password
Set the following in your .env on the Proxy
LITELLM_MASTER_KEY="sk-1234" # this is your master key for using the proxy server
UI_USERNAME=ishaan-litellm   # username to sign in on UI
UI_PASSWORD=langchain        # password to sign in on UI
On accessing the LiteLLM UI, you will be prompted to enter your username, password
5. Configure Root Redirect URL
When DOCS_URL is set to something other than "/", you can configure where the root path (/) redirects to using ROOT_REDIRECT_URL:
DOCS_URL="/docs"              # Set docs to a different path
ROOT_REDIRECT_URL="/ui"       # Redirect root path (/) to /ui
By default, DOCS_URL is "/", so this setting is only needed when you've changed DOCS_URL to a different path.
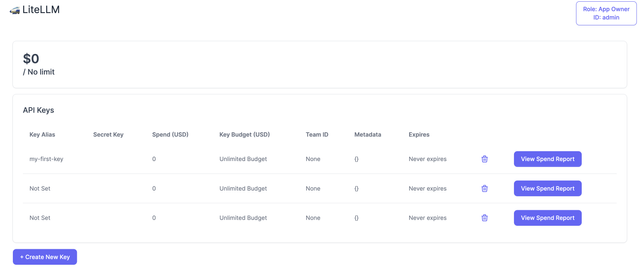
Invite-other users
Allow others to create/delete their own keys.
Model Management
The Admin UI provides comprehensive model management capabilities:
- Add Models: Add new models through the UI without restarting the proxy
- AI Hub: Make models and agents public for developers to discover what's available
- Price Data Sync: Keep model pricing data up to date by syncing from GitHub
For detailed information on model management, see Model Management.
For information on sharing models and agents, see AI Hub.
Sync model pricing data from GitHub to keep your model cost information current.
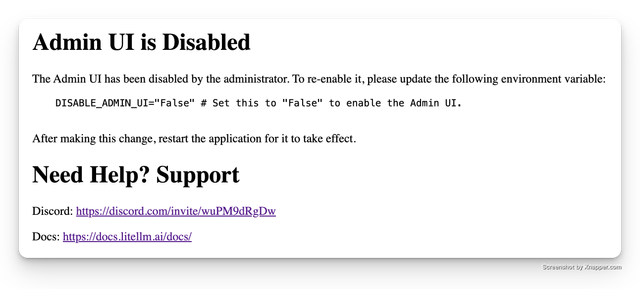
Disable Admin UI
Set DISABLE_ADMIN_UI="True" in your environment to disable the Admin UI.
Useful, if your security team has additional restrictions on UI usage.
Expected Response