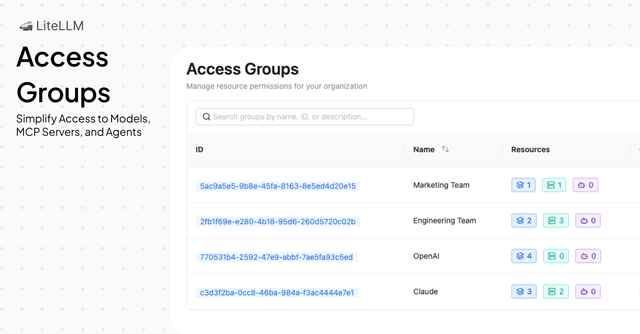
Access Groups
Access Groups simplify how you define and manage resource access across your organization. Instead of configuring models, MCP servers, and agents separately on each key or team, you create one group that bundles the resources you want to grant, then attach that group to your keys or teams.
Overview
Access Groups let you define a reusable set of allowed resources—models, MCP servers, and agents—in a single place. One group can grant access to all three resource types. Simply attach the group to a key or team, and they get access to everything defined in that group.
- Unified resource control – One group controls access to models, MCP servers, and agents together
- Reusable – Define once, attach to many keys or teams
- Easy to maintain – Update the group (add or remove resources) and all attached keys and teams automatically reflect the change
- Clear visibility – See exactly which resources each group grants and which keys/teams use it
How It Works
Key concept: Define resources in a group → Attach group to key or team → Key/team gets access to all resources in the group
| Resource Type | What the group controls |
|---|---|
| Models | Which LLM models keys/teams can use (e.g., gpt-4, claude-3-opus) |
| MCP Servers | Which MCP servers are available for tool calling |
| Agents | Which agents can be invoked |
How to Create and Use Access Groups in the UI
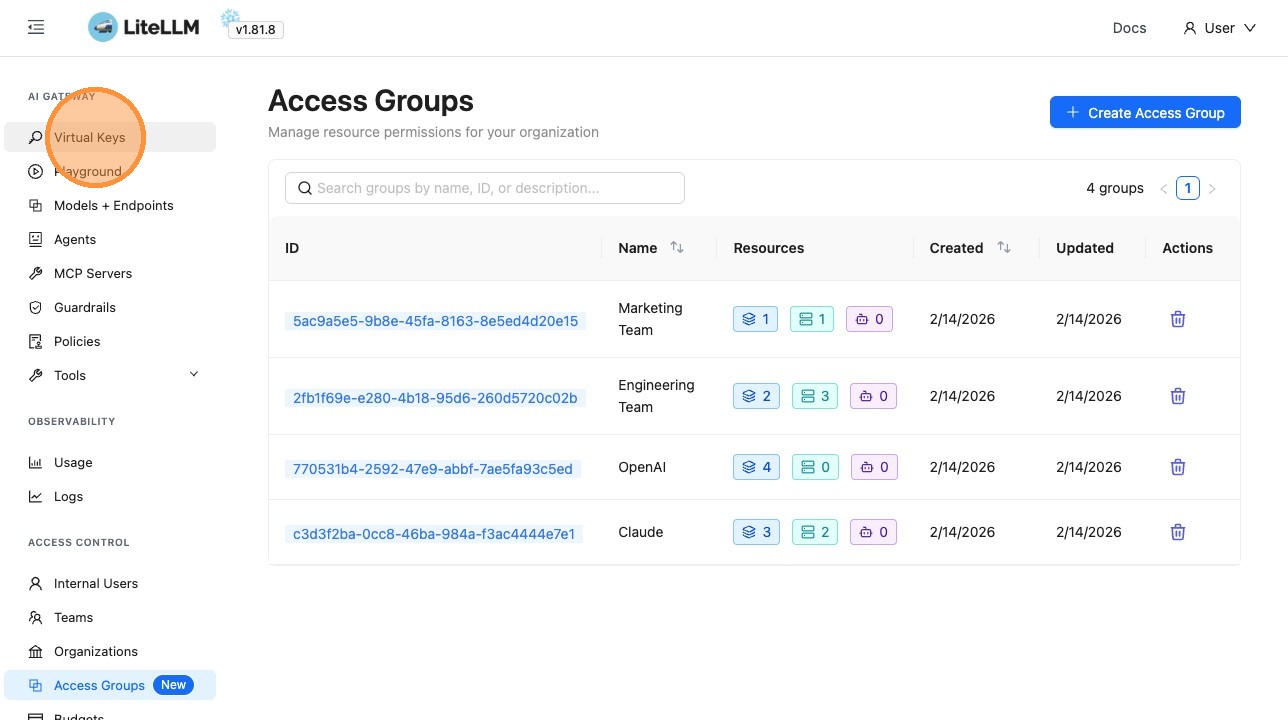
1. Navigate to Access Groups
Go to the Admin UI (e.g. http://localhost:4000/ui or your PROXY_BASE_URL/ui) and click Access Groups in the sidebar.
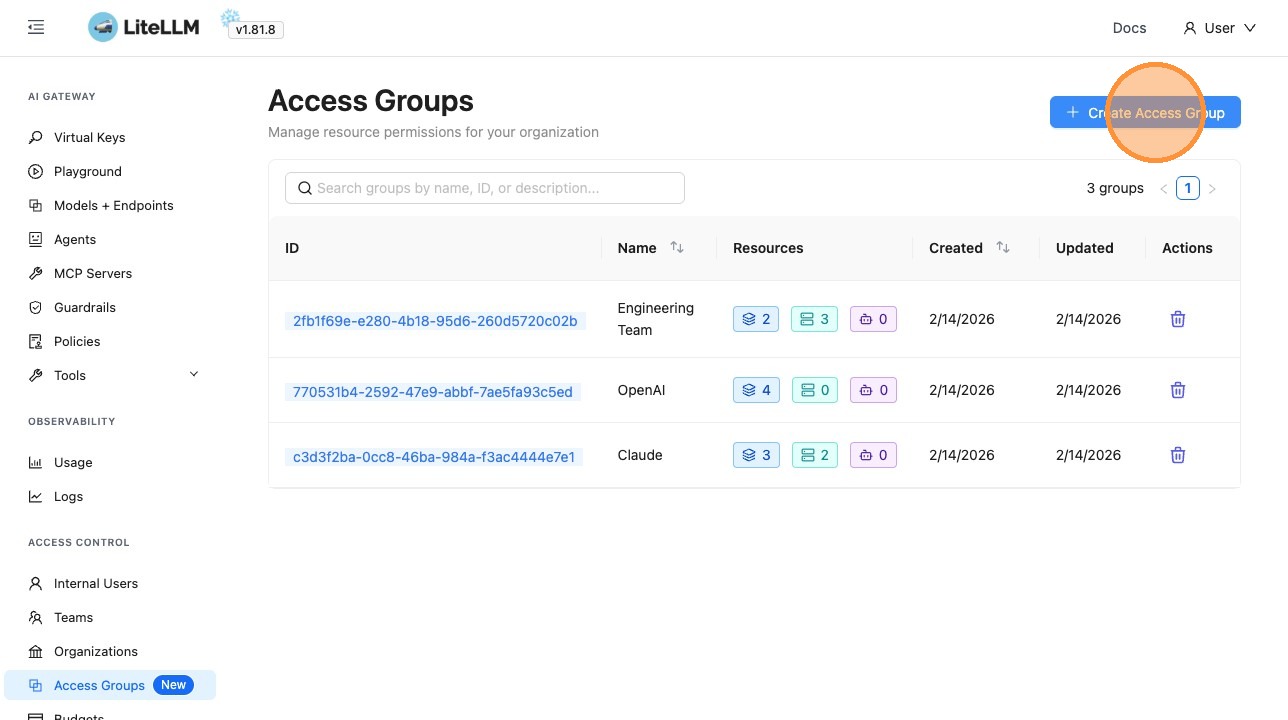
2. Create an Access Group
Click Create Access Group and give your group a name.
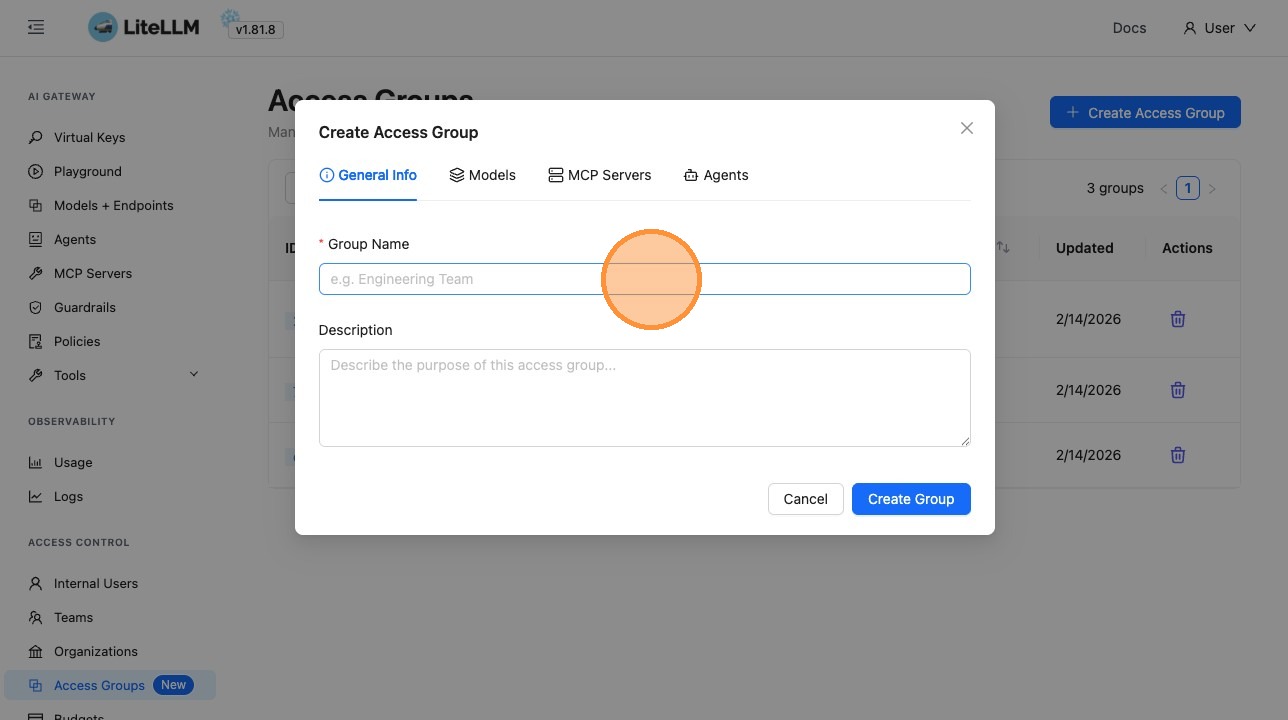
3. Define Resources in the Group
Use the tabs to select which models, MCP servers, and agents this group grants access to:
- Models tab – Select the LLM models
- MCP Servers tab – Select MCP servers (for tool calling)
- Agents tab – Select agents


4. Attach the Access Group to a Key
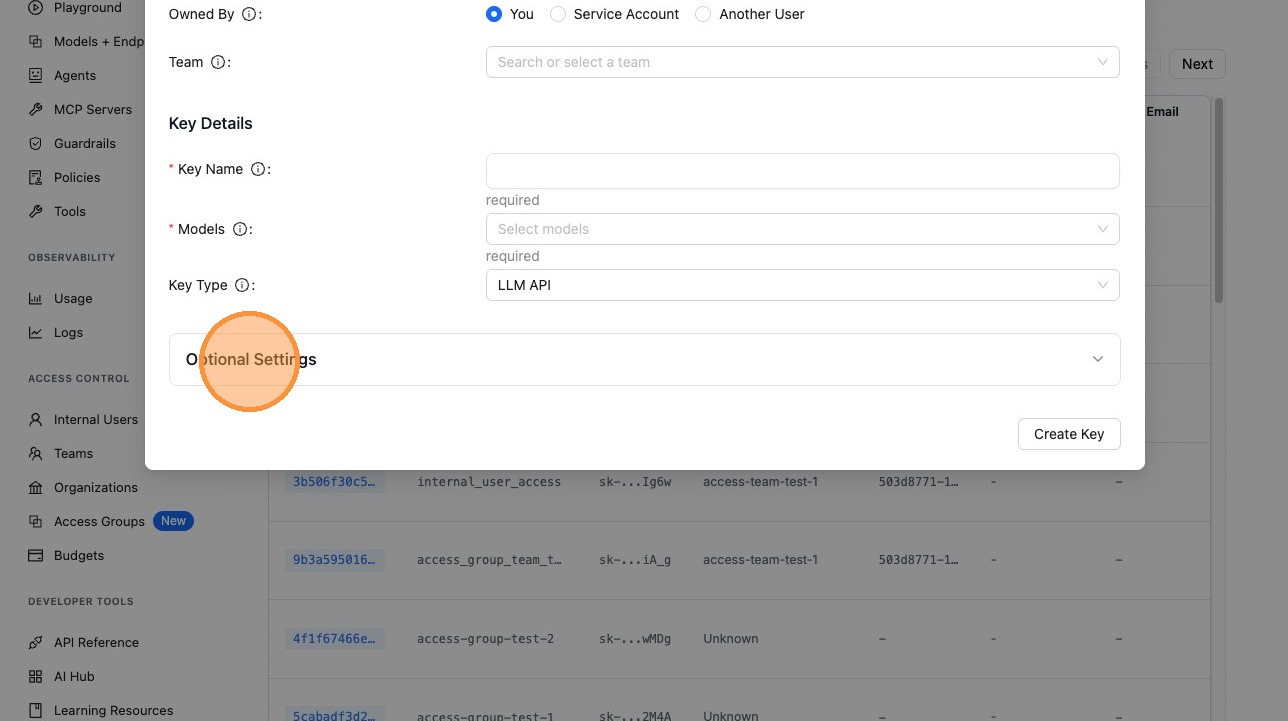
When creating or editing a virtual key, expand Optional Settings and select your Access Group. The key will inherit access to all models, MCP servers, and agents defined in that group.
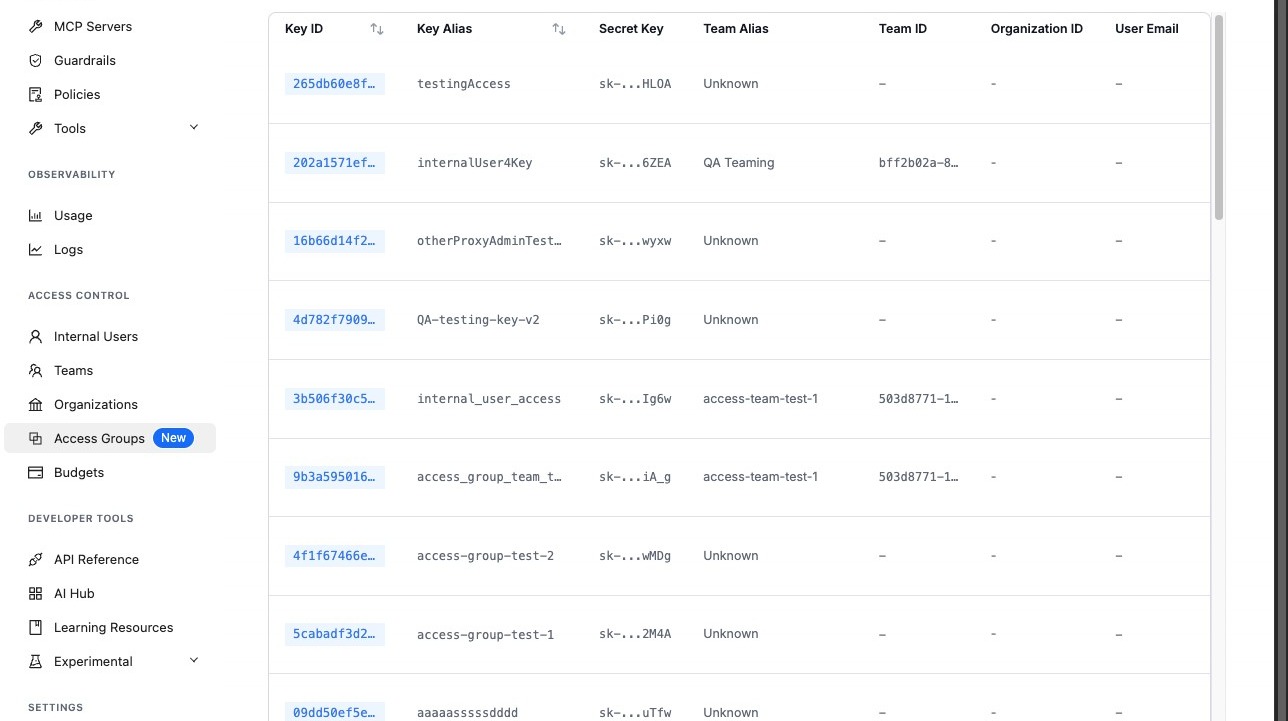
- Go to Virtual Keys and click + Create New Key
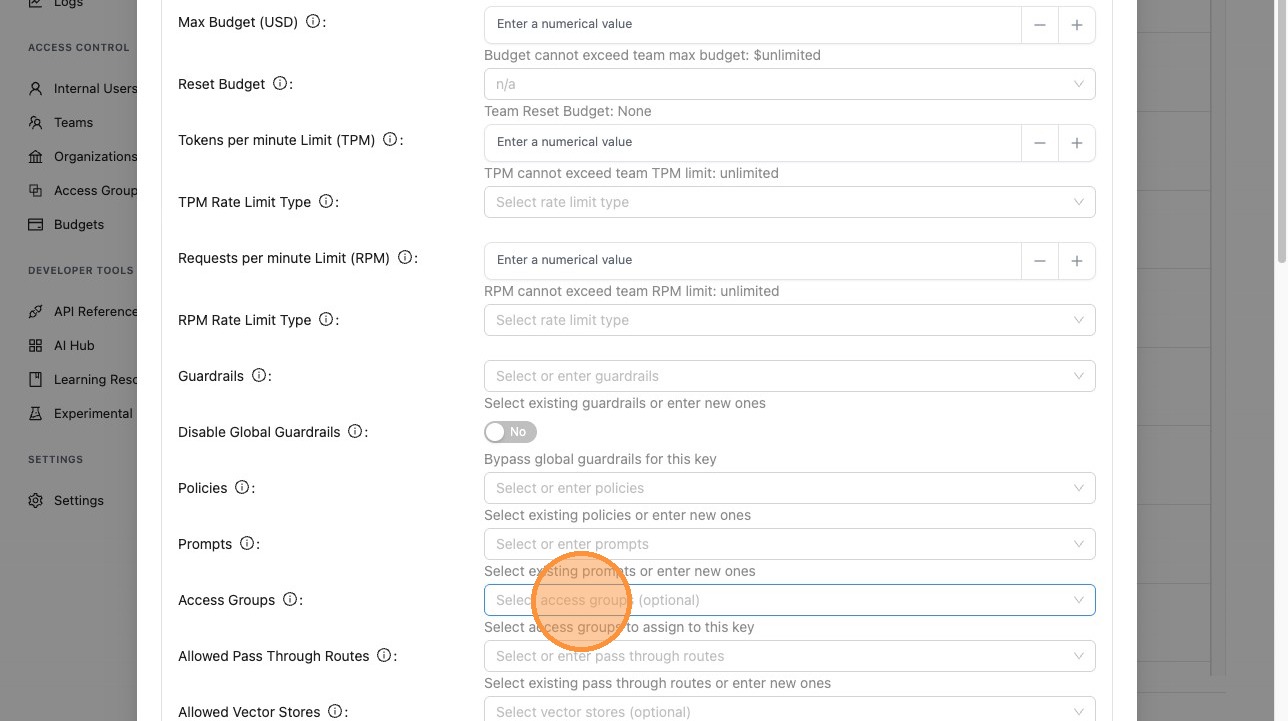
- Expand Optional Settings
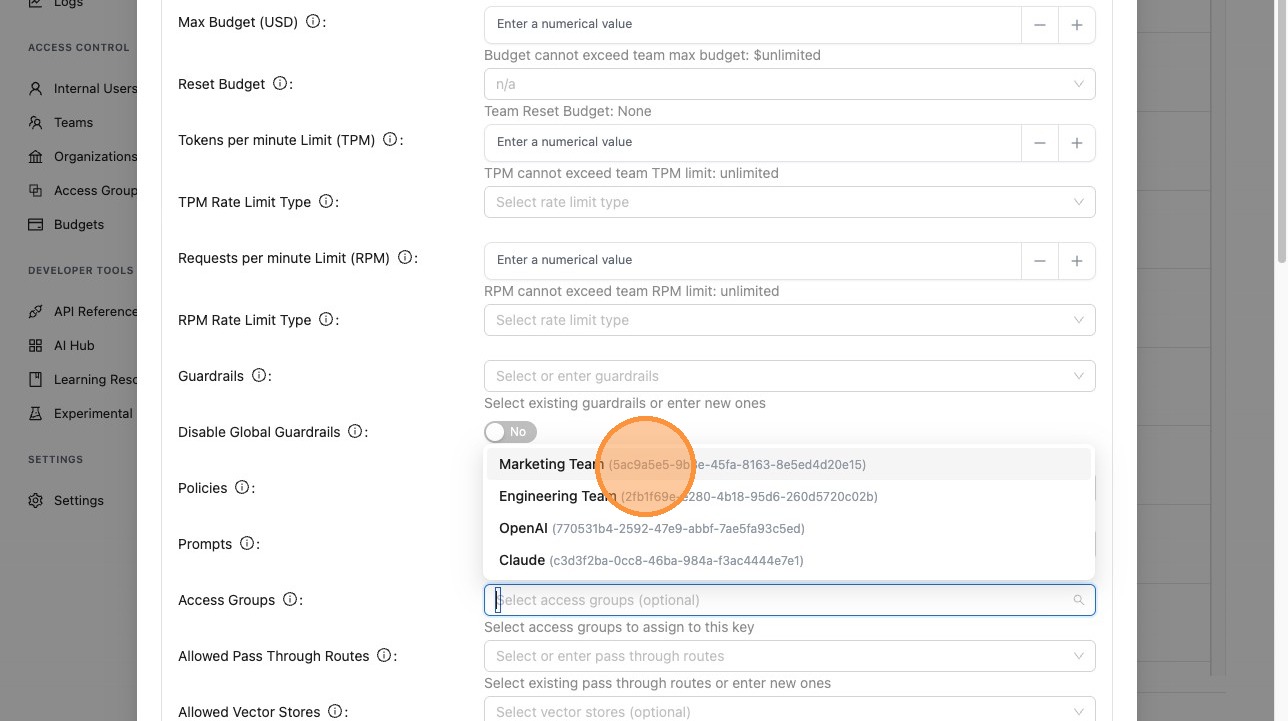
- In the Access Group field, select the group you created
- Save the key

5. Attach the Access Group to a Team
You can also attach an Access Group to a team when creating or editing the team. All keys associated with that team will then have access to the resources defined in the group.
Use Cases
Team-based Access
Create groups like "Engineering", "Data Science", or "Product" with the models, MCP servers, and agents each team needs. Attach the group to the team—no need to configure each resource on every key.
Environment Separation
- Production group – Production models, approved MCP servers, and production agents
- Development group – Cost-efficient models, experimental MCP tools, and dev agents
Attach the appropriate group to keys or teams based on environment.
Simplified Onboarding
New developers get a key with an Access Group instead of manually configuring models, MCP servers, and agents. Add them to the right team or give them a key with the correct group.
Centralized Updates
When you add a new model or MCP server to a group, every key and team attached to that group automatically gains access. Remove a resource from the group and it’s revoked everywhere at once.
Access Group vs. Model Access Groups
LiteLLM has two related concepts:
| Feature | Access Groups (this page) | Model Access Groups |
|---|---|---|
| Definition | Define in the UI; one group can include models, MCP servers, and agents | Defined in config or via API; groups are model-centric |
| Scope | Models + MCP servers + agents | Models only |
| Attach to | Keys, teams | Keys, teams |
| Use when | You want unified control over models, MCP, and agents from the UI | You need config-based or API-based model access control |
For config-based model access with access_groups in model_info, see Model Access Groups.
Related Documentation
- Virtual Keys – Creating and managing API keys
- Role-based Access Controls – Organizations, teams, and user roles
- Model Access Groups – Config-based model access groups
- MCP Control – MCP server setup and access control