Model Management
When STORE_MODEL_IN_DB is on, your models live in the database rather than in a static config.yaml. That means day-2 changes happen right in the Admin UI: adding a model, editing pricing, rotating a provider key, or retiring a deployment, all with no config edits and no proxy restart.
This page covers those ongoing operations. If you are adding your very first model, start with the Quickstart, which walks you through startup, provider connection, and your first request. Come back here once the gateway is running and you want to manage the models you have.
The model list
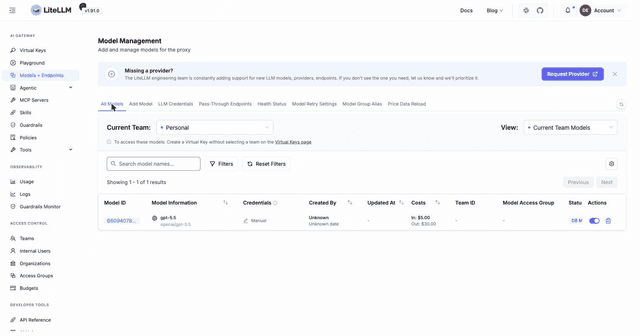
Go to Models + Endpoints and open the All Models tab to see every model the gateway currently serves. Each row shows the public model name, the underlying provider and litellm model, and the input and output cost per token that LiteLLM maps automatically from its model cost map.
A badge on each model tells you where it came from: models added through the UI or API carry a database badge, while models loaded from config.yaml are marked as config. This distinction matters because config models cannot be edited from the UI (see Database vs config.yaml models below). Use the search box and the provider filters to narrow a long list down to the models you care about.
Inspect and edit a model
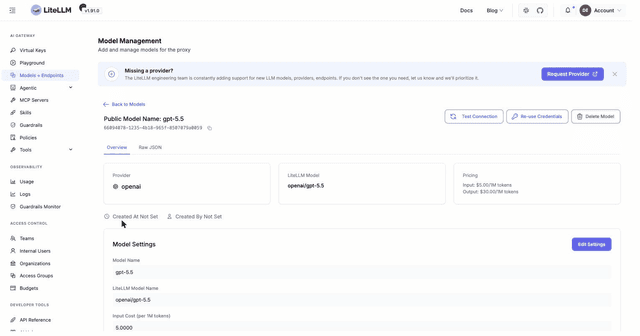
Click a Model ID in the list to open its detail page. The Overview tab summarizes the model's settings and provider, and the Raw JSON tab shows the full stored definition, useful when you want to confirm exactly what the gateway is holding.
Click Edit Settings to change the model in place. You can update the public model name that clients call, the litellm model name that requests are routed to, and the input and output cost per 1M tokens when you want to override the mapped pricing. Save, and the change takes effect immediately for new requests.
Two more actions live on this page. Test Connection re-verifies the model against the provider using its stored credentials, so you can confirm a key still works or that a newly edited setting is valid before clients hit it. Delete Model removes the model from the gateway; for database models this deletes the stored definition outright.
Reusable provider credentials
Most deployments have several models behind the same provider account. Rather than paste the same API key into every model, create a named credential once and reuse it.
Open the LLM Credentials tab and click Add Credential. Pick your provider, enter the API key, and give the credential a name. The fields adapt to the provider you choose, so selecting Vertex AI, for example, gives you Vertex Project, Vertex Location, and Vertex Credentials instead of a single key field.
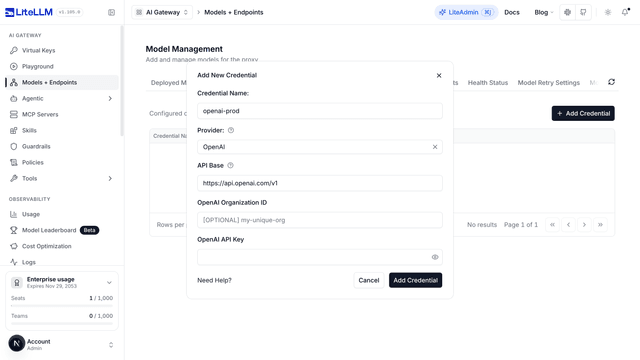
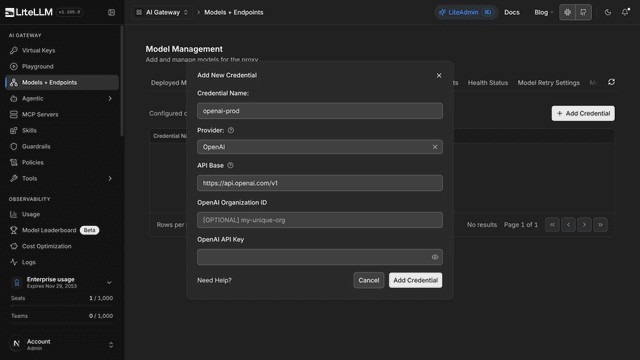
Once saved, the credential is available wherever you add or edit a model. In the Add Model form, choose it from the Existing Credentials dropdown instead of typing a key. From a model's detail page you can also go the other way with the Re-use Credentials button, which turns the credentials of a model you already configured into a named credential for future models. Models attached to a named credential are tagged Credential: <name> in the Usage page, so you can filter spend by credential without any extra setup; see Credential Usage Tracking.
Database vs config.yaml models
Storing models in the database is what makes UI-driven management possible. Turn it on by setting STORE_MODEL_IN_DB="True" as an environment variable, or general_settings.store_model_in_db: true in your config. You can also toggle it at runtime from the Models + Endpoints settings in the UI, which is handy for cloud deployments where editing the config means a full release; the UI value overrides the config value.
With it enabled, every model you add through the UI or the API persists in the database and survives restarts and additional proxy instances. Provider credentials for those models are encrypted at rest using LITELLM_SALT_KEY (falling back to LITELLM_MASTER_KEY if the salt key is not set); keep that value secret and never change it once models exist, since credentials encrypted with the old value cannot be decrypted with a new one.
Database storage does not replace your config.yaml. Any models defined there keep working and show up alongside your database models. The one difference is that config models are owned by the file, so they cannot be edited or deleted from the UI; change them in the config and reload. For the config format itself, see Config.yaml.
Settings behave differently from models here. Anything the UI writes into general_settings, router_settings, litellm_settings, or environment_variables is stored in LiteLLM_Config and overlaid on top of your config.yaml at startup, so the database value wins and editing the same key in the YAML then restarting will not take effect. See config.yaml vs database settings.
Choose one source of truth for models
For production deployments, use one primary source of truth for model definitions:
| Approach | Storage | Restart required for model changes? | Best for |
|---|---|---|---|
config.yaml | Configuration file | Yes. Reload or restart the proxy tasks after changing the file. | GitOps workflows where every model change is deployed with the application. |
| Admin UI, management API, or Terraform | LiteLLM database | No. Changes apply to new requests after the write succeeds. | Day-2 operations, frequent model changes, and centralized automation. |
LiteLLM can load file-based and database-backed models at the same time, but using both as model-management systems creates two sources of truth. A model loaded from config.yaml remains owned by that file and cannot be edited or deleted through the UI. Keep model definitions in one system, and continue using config.yaml or environment variables for infrastructure settings that are not exposed through the management API.
The LiteLLM Terraform provider calls the same management API used by the Admin UI. It persists resources in the LiteLLM database, so you do not need to build a separate REST client or restart the proxy for model changes.
Automation (API)
The same operations are available over HTTP, which is what you want for CI/CD or scripting bulk changes. These endpoints require store_model_in_db to be enabled; with it off, POST /model/new fails because there is nowhere to persist the model.
Add a model:
curl -X POST "http://0.0.0.0:4000/model/new" \
    -H "Authorization: Bearer $LITELLM_MASTER_KEY" \
    -H "Content-Type: application/json" \
    -d '{
      "model_name": "azure-gpt-4o",
      "litellm_params": {
        "model": "azure/gpt-5.6-terra",
        "api_key": "os.environ/AZURE_API_KEY",
        "api_base": "https://my-endpoint.openai.azure.com/"
      }
    }'
The rest of the operations:
| Operation | Route | Notes |
|---|---|---|
| List models | GET /model/info | Returns the full model list with API keys masked |
| Update a model | POST /model/update | Change litellm_params or model_info for an existing model |
| Delete a model | POST /model/delete | Body {"id": "<model_id>"}, admin only. This is a POST; there is no DELETE-verb route |
You can attach arbitrary model_info fields when you create or update a model, and they pass straight through to GET /model/info alongside the mapped cost and context data. That is the mechanism for annotating models with your own metadata, such as an owning team, a description, or a version, and reading it back programmatically.

