Connect Codex in ChatGPT Desktop to LiteLLM
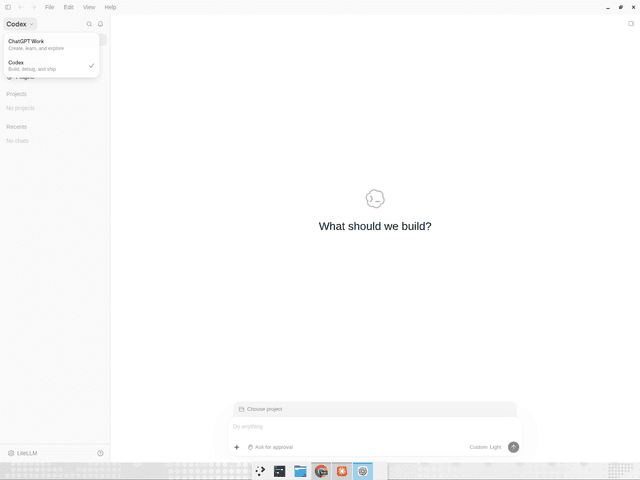
Select Codex in the ChatGPT desktop app. It reads the same ~/.codex/config.toml as the Codex CLI, so the desktop and CLI can share a LiteLLM connection.
These settings configure the Codex side of the app, which reads ~/.codex/config.toml. Regular ChatGPT chats in the app are not configured by that file and do not go through LiteLLM
The same model_catalog_json setting applies to the app; see Model metadata for custom aliases
These instructions configure Codex's local model provider and MCP servers. Screenshots show ChatGPT Desktop 26.917.51856 on Linux; menu labels can differ by app version. Complete the app's onboarding if prompted before selecting Codex.
Quick reference
| Setting | Value |
|---|---|
| Config file | ~/.codex/config.toml (shared with the CLI) |
base_url | <LITELLM_PROXY_BASE_URL>/v1 (e.g. http://localhost:4000/v1) |
| Provider key | Your LiteLLM virtual key, read from the env var named in env_key, or a lite auth print-token command (see Codex CLI SSO) |
| MCP endpoint | <LITELLM_PROXY_BASE_URL>/<server_name>/mcp |
| MCP auth | The same virtual key, read from the env var named in bearer_token_env_var |
LLM setup
1. Add LiteLLM as a model provider
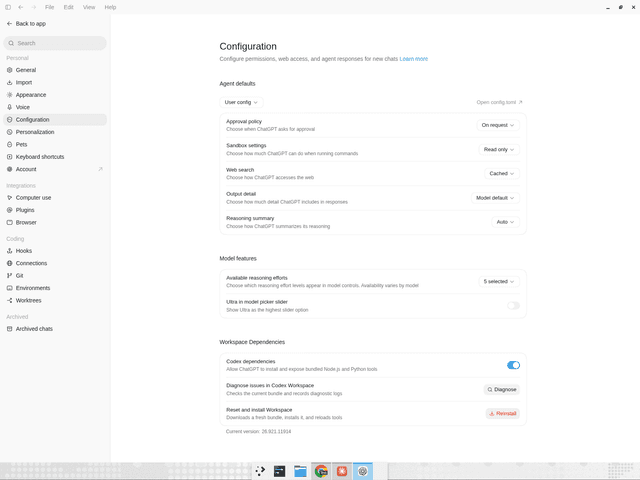
Open Settings -> Configuration -> Open config.toml, or edit ~/.codex/config.toml directly, and add a provider block pointing at your gateway's Responses API endpoint. This is identical to the CLI setup:
model = "claude-sonnet-5"
model_provider = "litellm"

[model_providers.litellm]
name = "LiteLLM"
base_url = "http://localhost:4000/v1"
env_key = "LITELLM_API_KEY"
wire_api = "responses"
Replace claude-sonnet-5 with a model name configured on your gateway.
Desktop apps may not inherit variables exported in your terminal. Add your LiteLLM virtual key to ~/.codex/.env before launching the app:
LITELLM_API_KEY=sk-<your-virtual-key>
Replace the placeholder with your virtual key, keep this file private, and restart the app after changing it. An existing macOS setup using launchctl setenv LITELLM_API_KEY <your-key> can continue supplying the variable that way.
You can skip .env by using the auth command in place of env_key, because the app runs the same helper
2. Launch Codex in ChatGPT Desktop
Open the ChatGPT desktop app and select Codex in the mode switcher. Codex reads the litellm provider from config.toml and uses LITELLM_API_KEY for gateway requests. Start a new task.
3. Verify
Run a task, then check the Admin UI under Logs or Usage; the request should be attributed to your virtual key.
To use a different gateway model, update model in config.toml and start a new task.
MCP setup
1. Configure the gateway server
MCP is configured in the same ~/.codex/config.toml, so the CLI's MCP setup applies unchanged. Add:
[mcp_servers.litellm]
url = "http://localhost:4000/my_mcp_server/mcp"
bearer_token_env_var = "LITELLM_API_KEY"
where my_mcp_server matches a key under mcp_servers: in your gateway config and the key has access to that server. LITELLM_API_KEY must be available to the app as described above. Restart ChatGPT Desktop after changing the configuration or .env file.
You can inspect this entry under Settings -> Plugins -> MCPs in the captured version. The Add MCP server form also accepts the URL and Bearer token env var shown above.
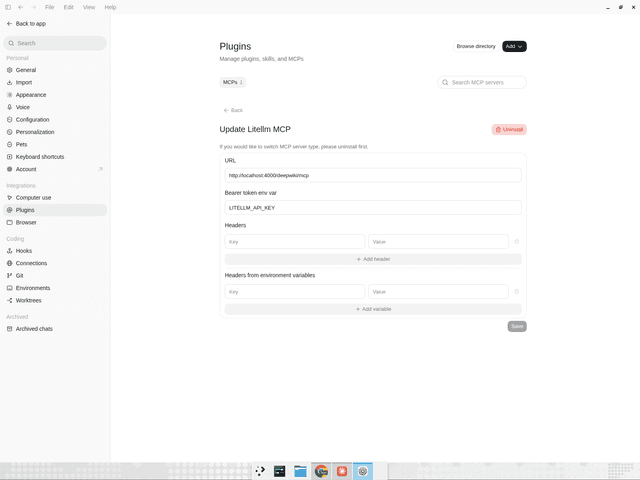
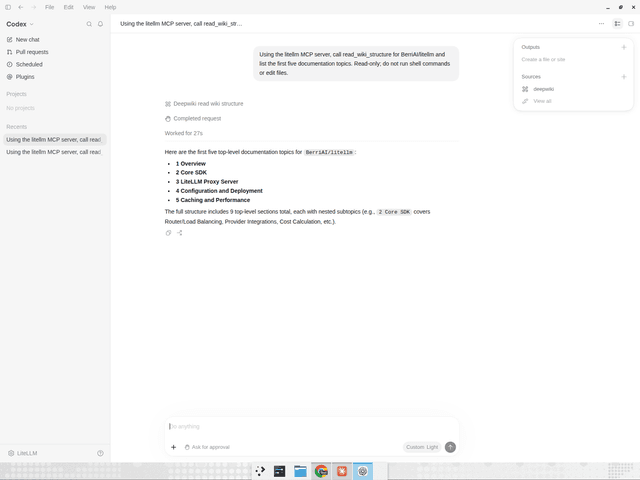
The screenshots use a gateway server named deepwiki; substitute your registered server name.
2. Verify the connection in the app
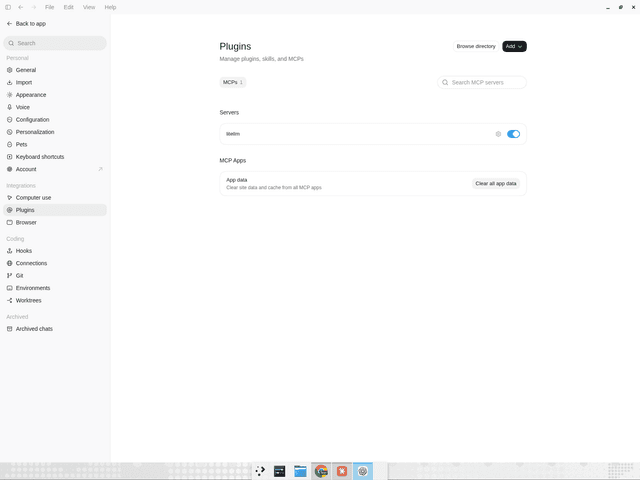
Open Settings -> Plugins -> MCPs and confirm that litellm is enabled. Some versions expose this list directly under Settings -> MCP servers.
Start a task that calls a read-only tool from your server, approve it if prompted, and verify that it returns a result.
See the MCP configuration reference for endpoint and authentication options.
Next steps
Codex CLI shares this config file. See also LiteLLM virtual keys and the MCP gateway reference.

