LangGraph
Call LangGraph agents through LiteLLM using the OpenAI chat completions format.
| Property | Details |
|---|---|
| Description | LangGraph is a framework for building stateful, multi-actor applications with LLMs. LiteLLM supports calling LangGraph agents via their streaming and non-streaming endpoints. |
| Provider Route on LiteLLM | langgraph/{agent_id} |
| Provider Doc | LangGraph Platform ↗ |
Prerequisites: You need a running LangGraph server. See Setting Up a Local LangGraph Server below.
Quick Start
Model Format
langgraph/{agent_id}
Example:
langgraph/agent- calls the default agent
LiteLLM Python SDK
import litellm

response = litellm.completion(
    model="langgraph/agent",
    messages=[
        {"role": "user", "content": "What is 25 * 4?"}
    ],
    api_base="http://localhost:2024",
)

print(response.choices[0].message.content)
import litellm

response = litellm.completion(
    model="langgraph/agent",
    messages=[
        {"role": "user", "content": "What is the weather in Tokyo?"}
    ],
    api_base="http://localhost:2024",
    stream=True,
)

for chunk in response:
    if chunk.choices[0].delta.content:
        print(chunk.choices[0].delta.content, end="")
LiteLLM Proxy
1. Configure your model in config.yaml
- config.yaml
model_list:
  - model_name: langgraph-agent
    litellm_params:
      model: langgraph/agent
      api_base: http://localhost:2024
2. Start the LiteLLM Proxy
litellm --config config.yaml
3. Make requests to your LangGraph agent
- Curl
- OpenAI Python SDK
curl http://localhost:4000/v1/chat/completions \
  -H "Content-Type: application/json" \
  -H "Authorization: Bearer $LITELLM_API_KEY" \
  -d '{
    "model": "langgraph-agent",
    "messages": [
      {"role": "user", "content": "What is 25 * 4?"}
    ]
  }'
curl http://localhost:4000/v1/chat/completions \
  -H "Content-Type: application/json" \
  -H "Authorization: Bearer $LITELLM_API_KEY" \
  -d '{
    "model": "langgraph-agent",
    "messages": [
      {"role": "user", "content": "What is the weather in Tokyo?"}
    ],
    "stream": true
  }'
from openai import OpenAI

client = OpenAI(
    base_url="http://localhost:4000",
    api_key="your-litellm-api-key"
)

response = client.chat.completions.create(
    model="langgraph-agent",
    messages=[
        {"role": "user", "content": "What is 25 * 4?"}
    ]
)

print(response.choices[0].message.content)
from openai import OpenAI

client = OpenAI(
    base_url="http://localhost:4000",
    api_key="your-litellm-api-key"
)

stream = client.chat.completions.create(
    model="langgraph-agent",
    messages=[
        {"role": "user", "content": "What is the weather in Tokyo?"}
    ],
    stream=True
)

for chunk in stream:
    if chunk.choices[0].delta.content is not None:
        print(chunk.choices[0].delta.content, end="")
Environment Variables
| Variable | Description |
|---|---|
LANGGRAPH_API_BASE | Base URL of your LangGraph server (default: http://localhost:2024) |
LANGGRAPH_API_KEY | Optional API key for authentication |
Supported Parameters
| Parameter | Type | Description |
|---|---|---|
model | string | The agent ID in format langgraph/{agent_id} |
messages | array | Chat messages in OpenAI format |
stream | boolean | Enable streaming responses |
api_base | string | LangGraph server URL |
api_key | string | Optional API key |
Setting Up a Local LangGraph Server
Before using LiteLLM with LangGraph, you need a running LangGraph server.
Prerequisites
- Python 3.11+
- An LLM API key (OpenAI or Google Gemini)
1. Install the LangGraph CLI
uv add "langgraph-cli[inmem]"
2. Create a new LangGraph project
langgraph new my-agent --template new-langgraph-project-python
cd my-agent
3. Install dependencies
uv add -e .
4. Set your API key
echo "OPENAI_API_KEY=your_key_here" > .env
5. Start the server
langgraph dev
The server will start at http://localhost:2024.
Verify the server is running
curl -s --request POST \
  --url "http://localhost:2024/runs/wait" \
  --header 'Content-Type: application/json' \
  --data '{
    "assistant_id": "agent",
    "input": {
      "messages": [{"role": "human", "content": "Hello!"}]
    }
  }'
LiteLLM A2A Gateway
You can register LangGraph agents in LiteLLM's A2A (Agent-to-Agent) Gateway, discover their upstream agent card, curate skills and capabilities, and invoke them through the LiteLLM proxy.
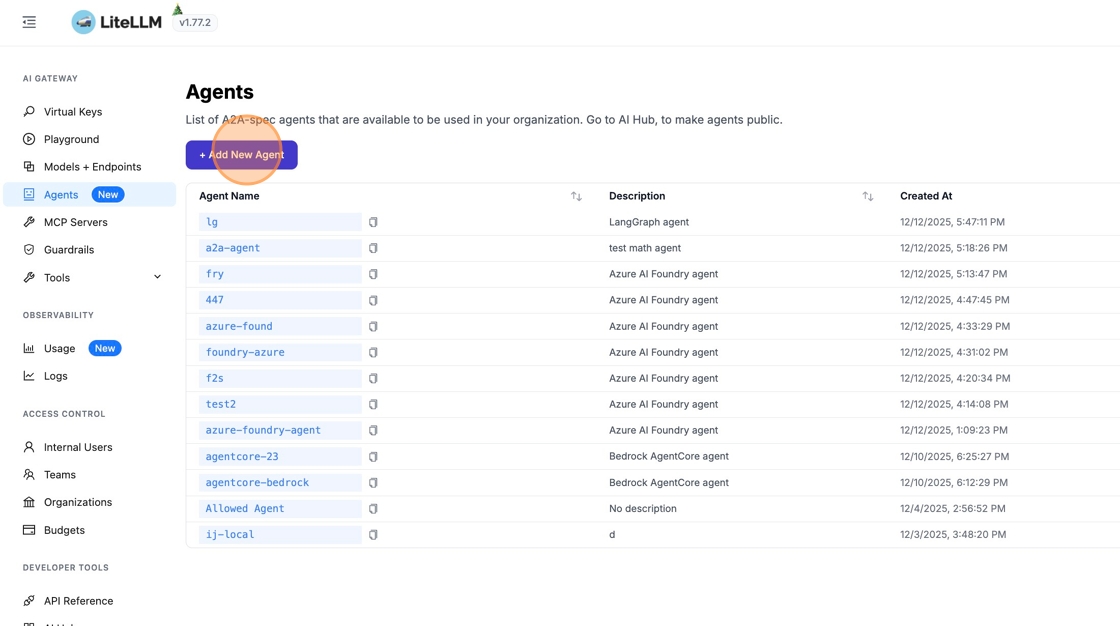
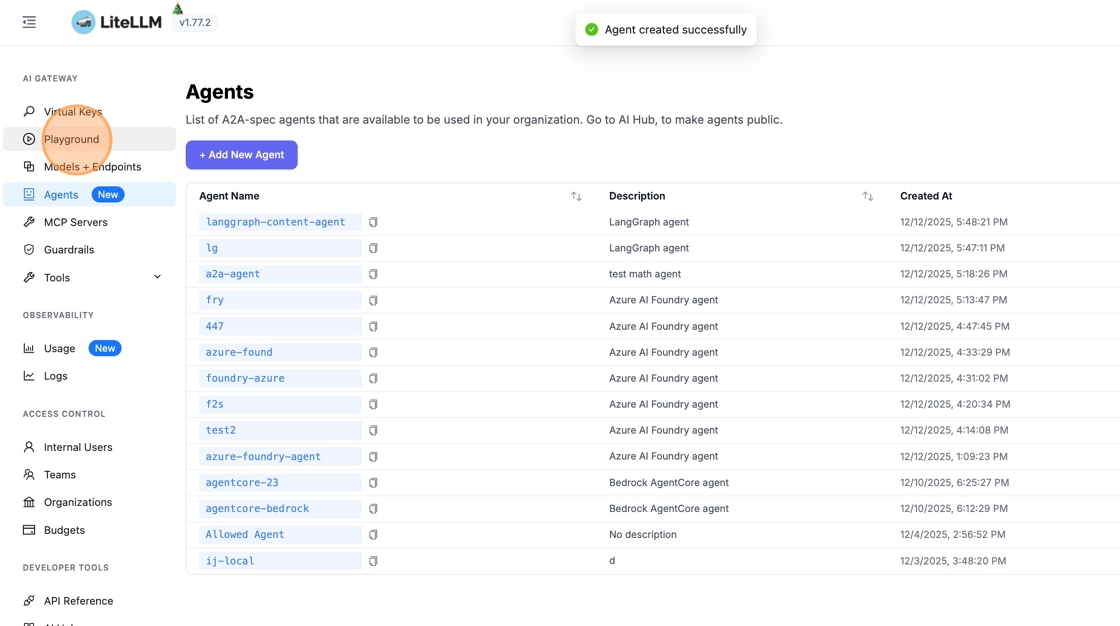
1. Navigate to Agents
From the sidebar, click "Agents" to open the agent management page, then click "+ Add New Agent".
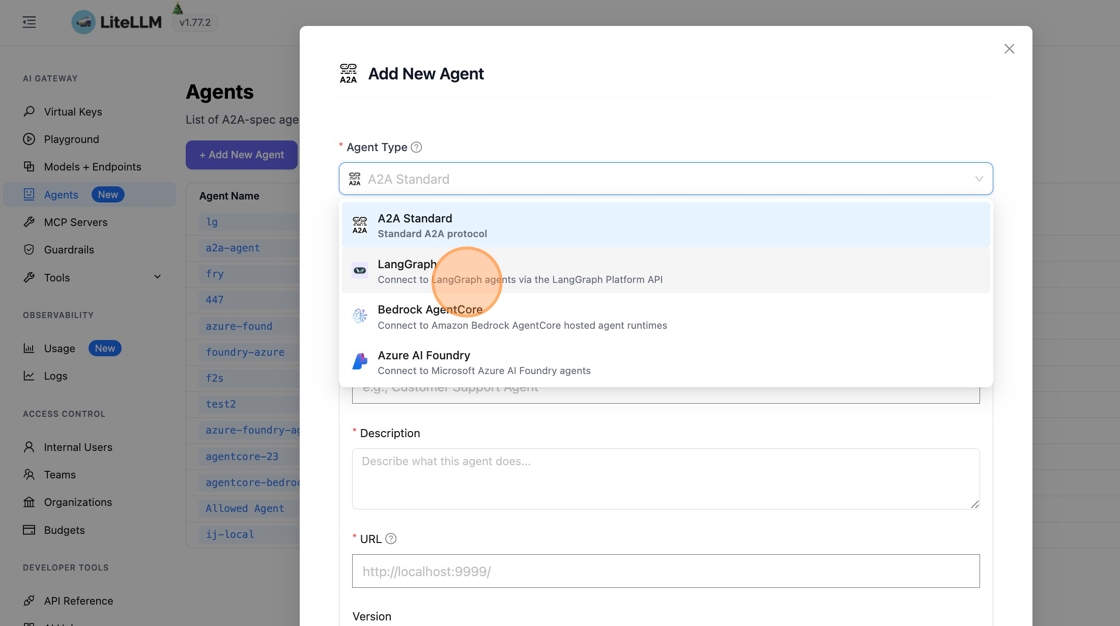
2. Select LangGraph Agent Type
Click "A2A Standard" to see available agent types, then search for "langgraph" and select "Connect to LangGraph agents via the LangGraph Platform API".
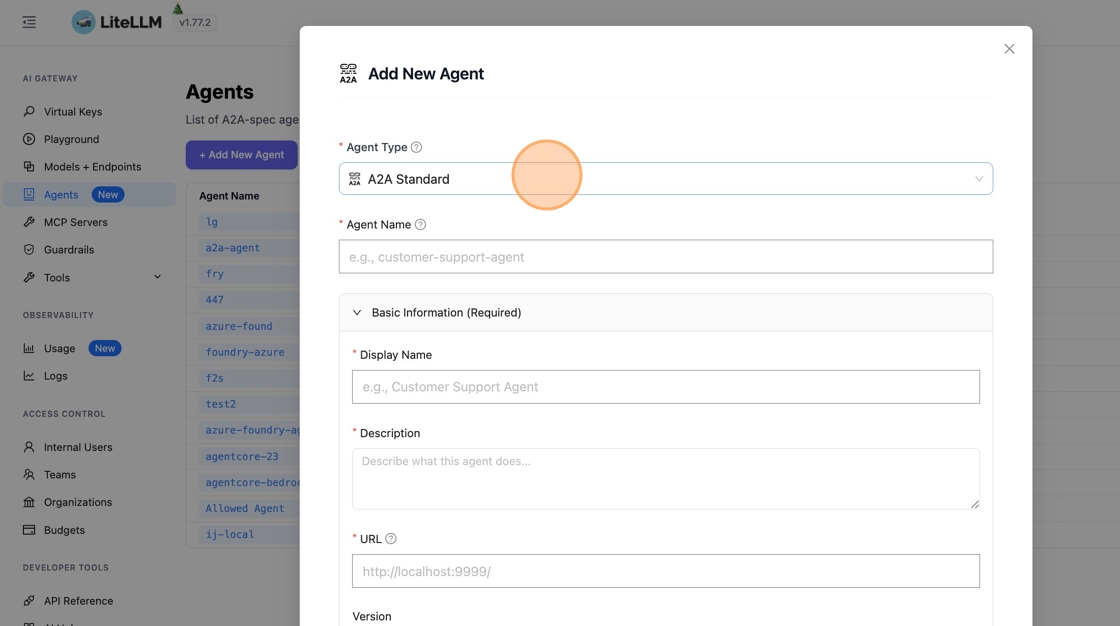
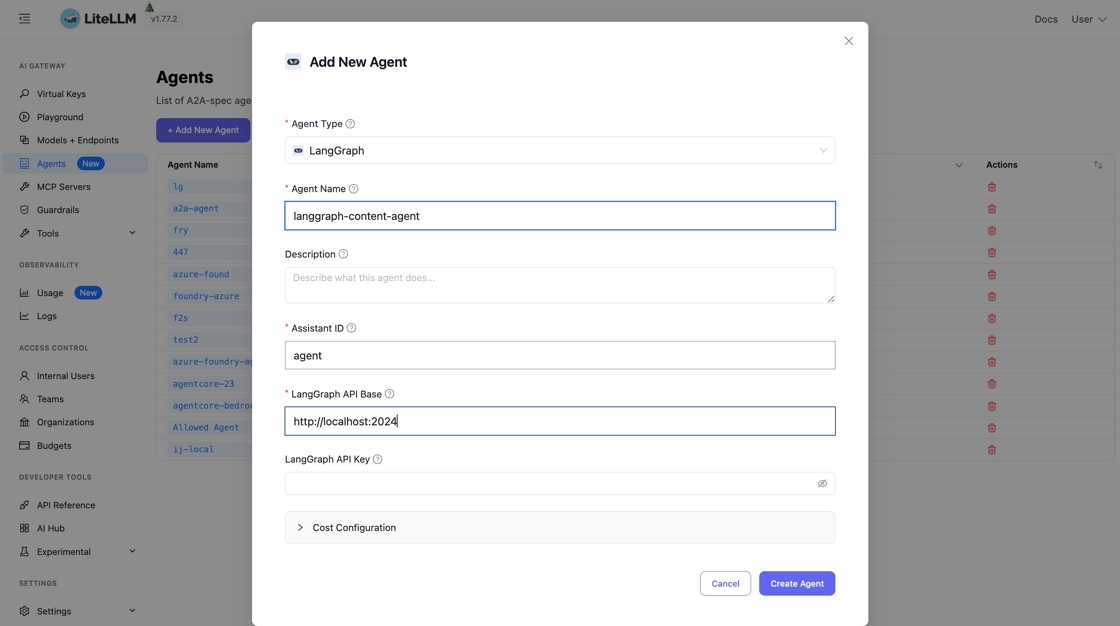
3. Configure the Agent
Fill in the following fields:
- Agent Name - A unique identifier (e.g.,
lan-agent) - LangGraph API Base - Your LangGraph server URL, typically
http://127.0.0.1:2024/ - API Key - Optional. LangGraph doesn't require an API key by default
- Assistant ID - Not used by LangGraph, you can enter any string here

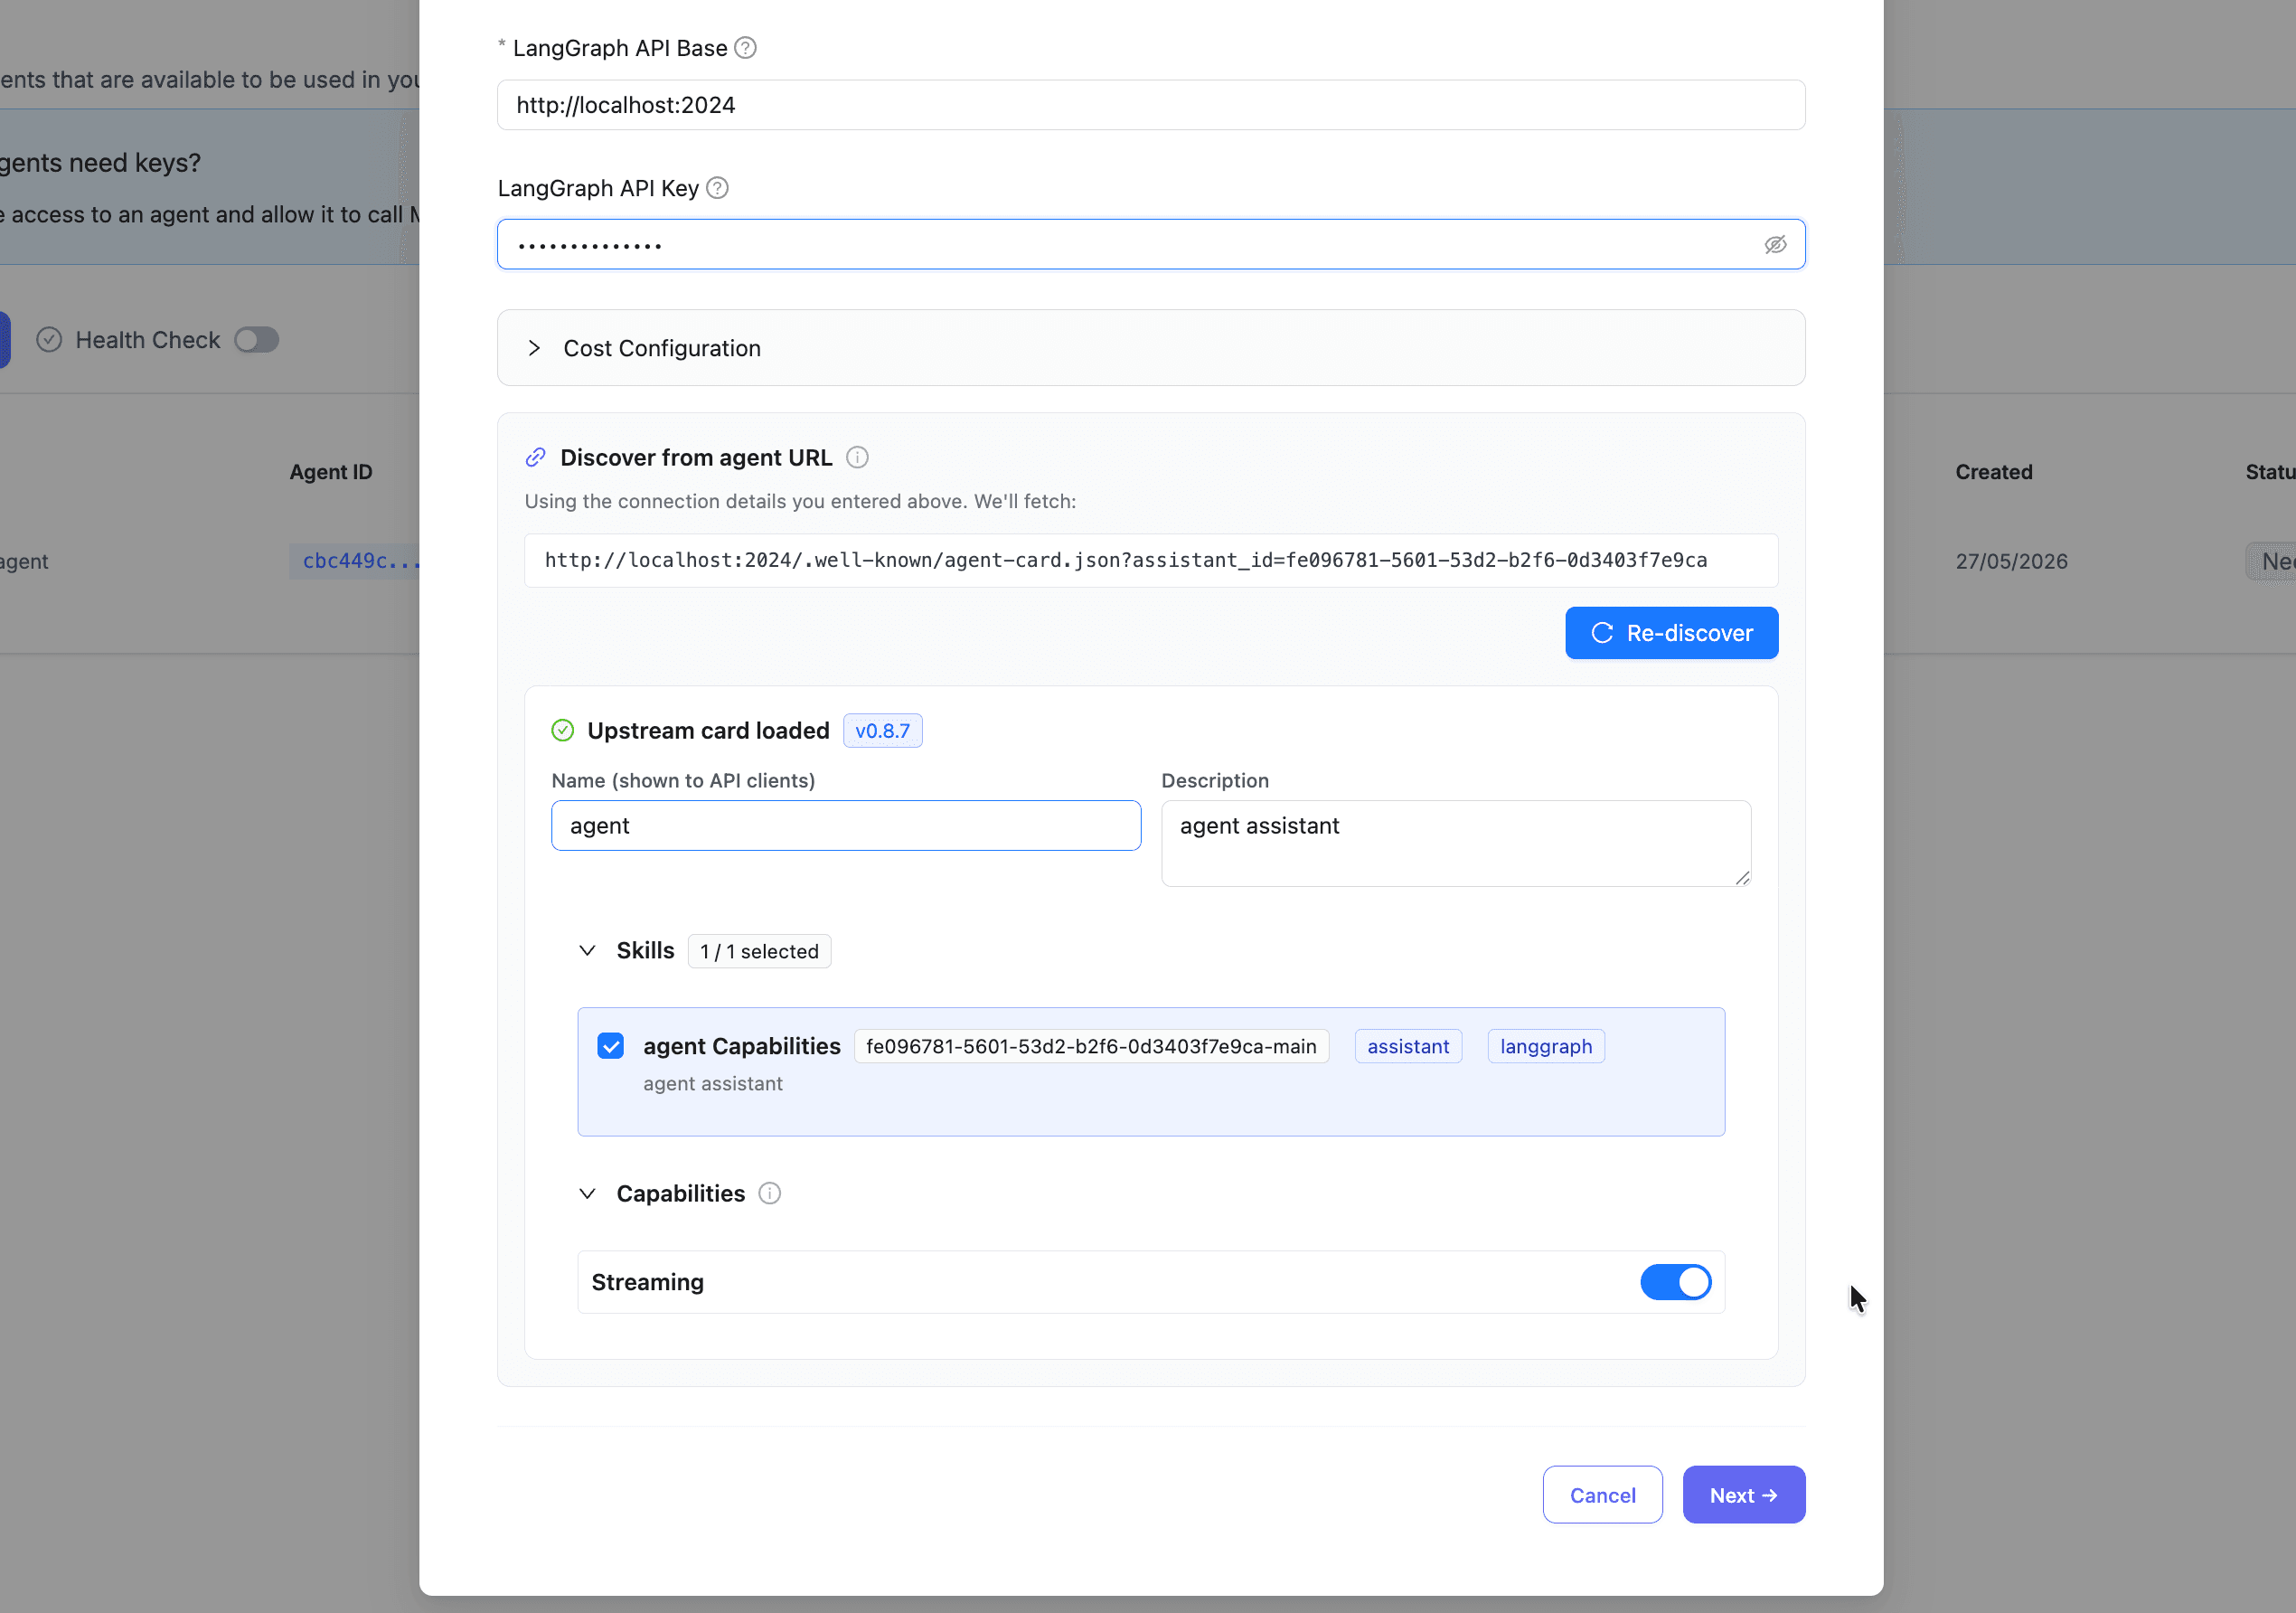
4: Discover the agent card
Discovery runs automatically once the base URL and assistant ID are filled in. You can also trigger it manually from the discovery panel.
The preview is a form. You can:
- Edit the name, description, provider, icon URL, and documentation URL.
- Add, remove, or reorder skills, and edit each skill's name, description, tags, examples, and input/output modes.
- Toggle capabilities that LiteLLM supports.
Select or deselect skills and capabilities before saving. LiteLLM only persists what you keep in the form.
Fields LiteLLM does not proxy are not shown. For the full support matrix, see Agent card support.
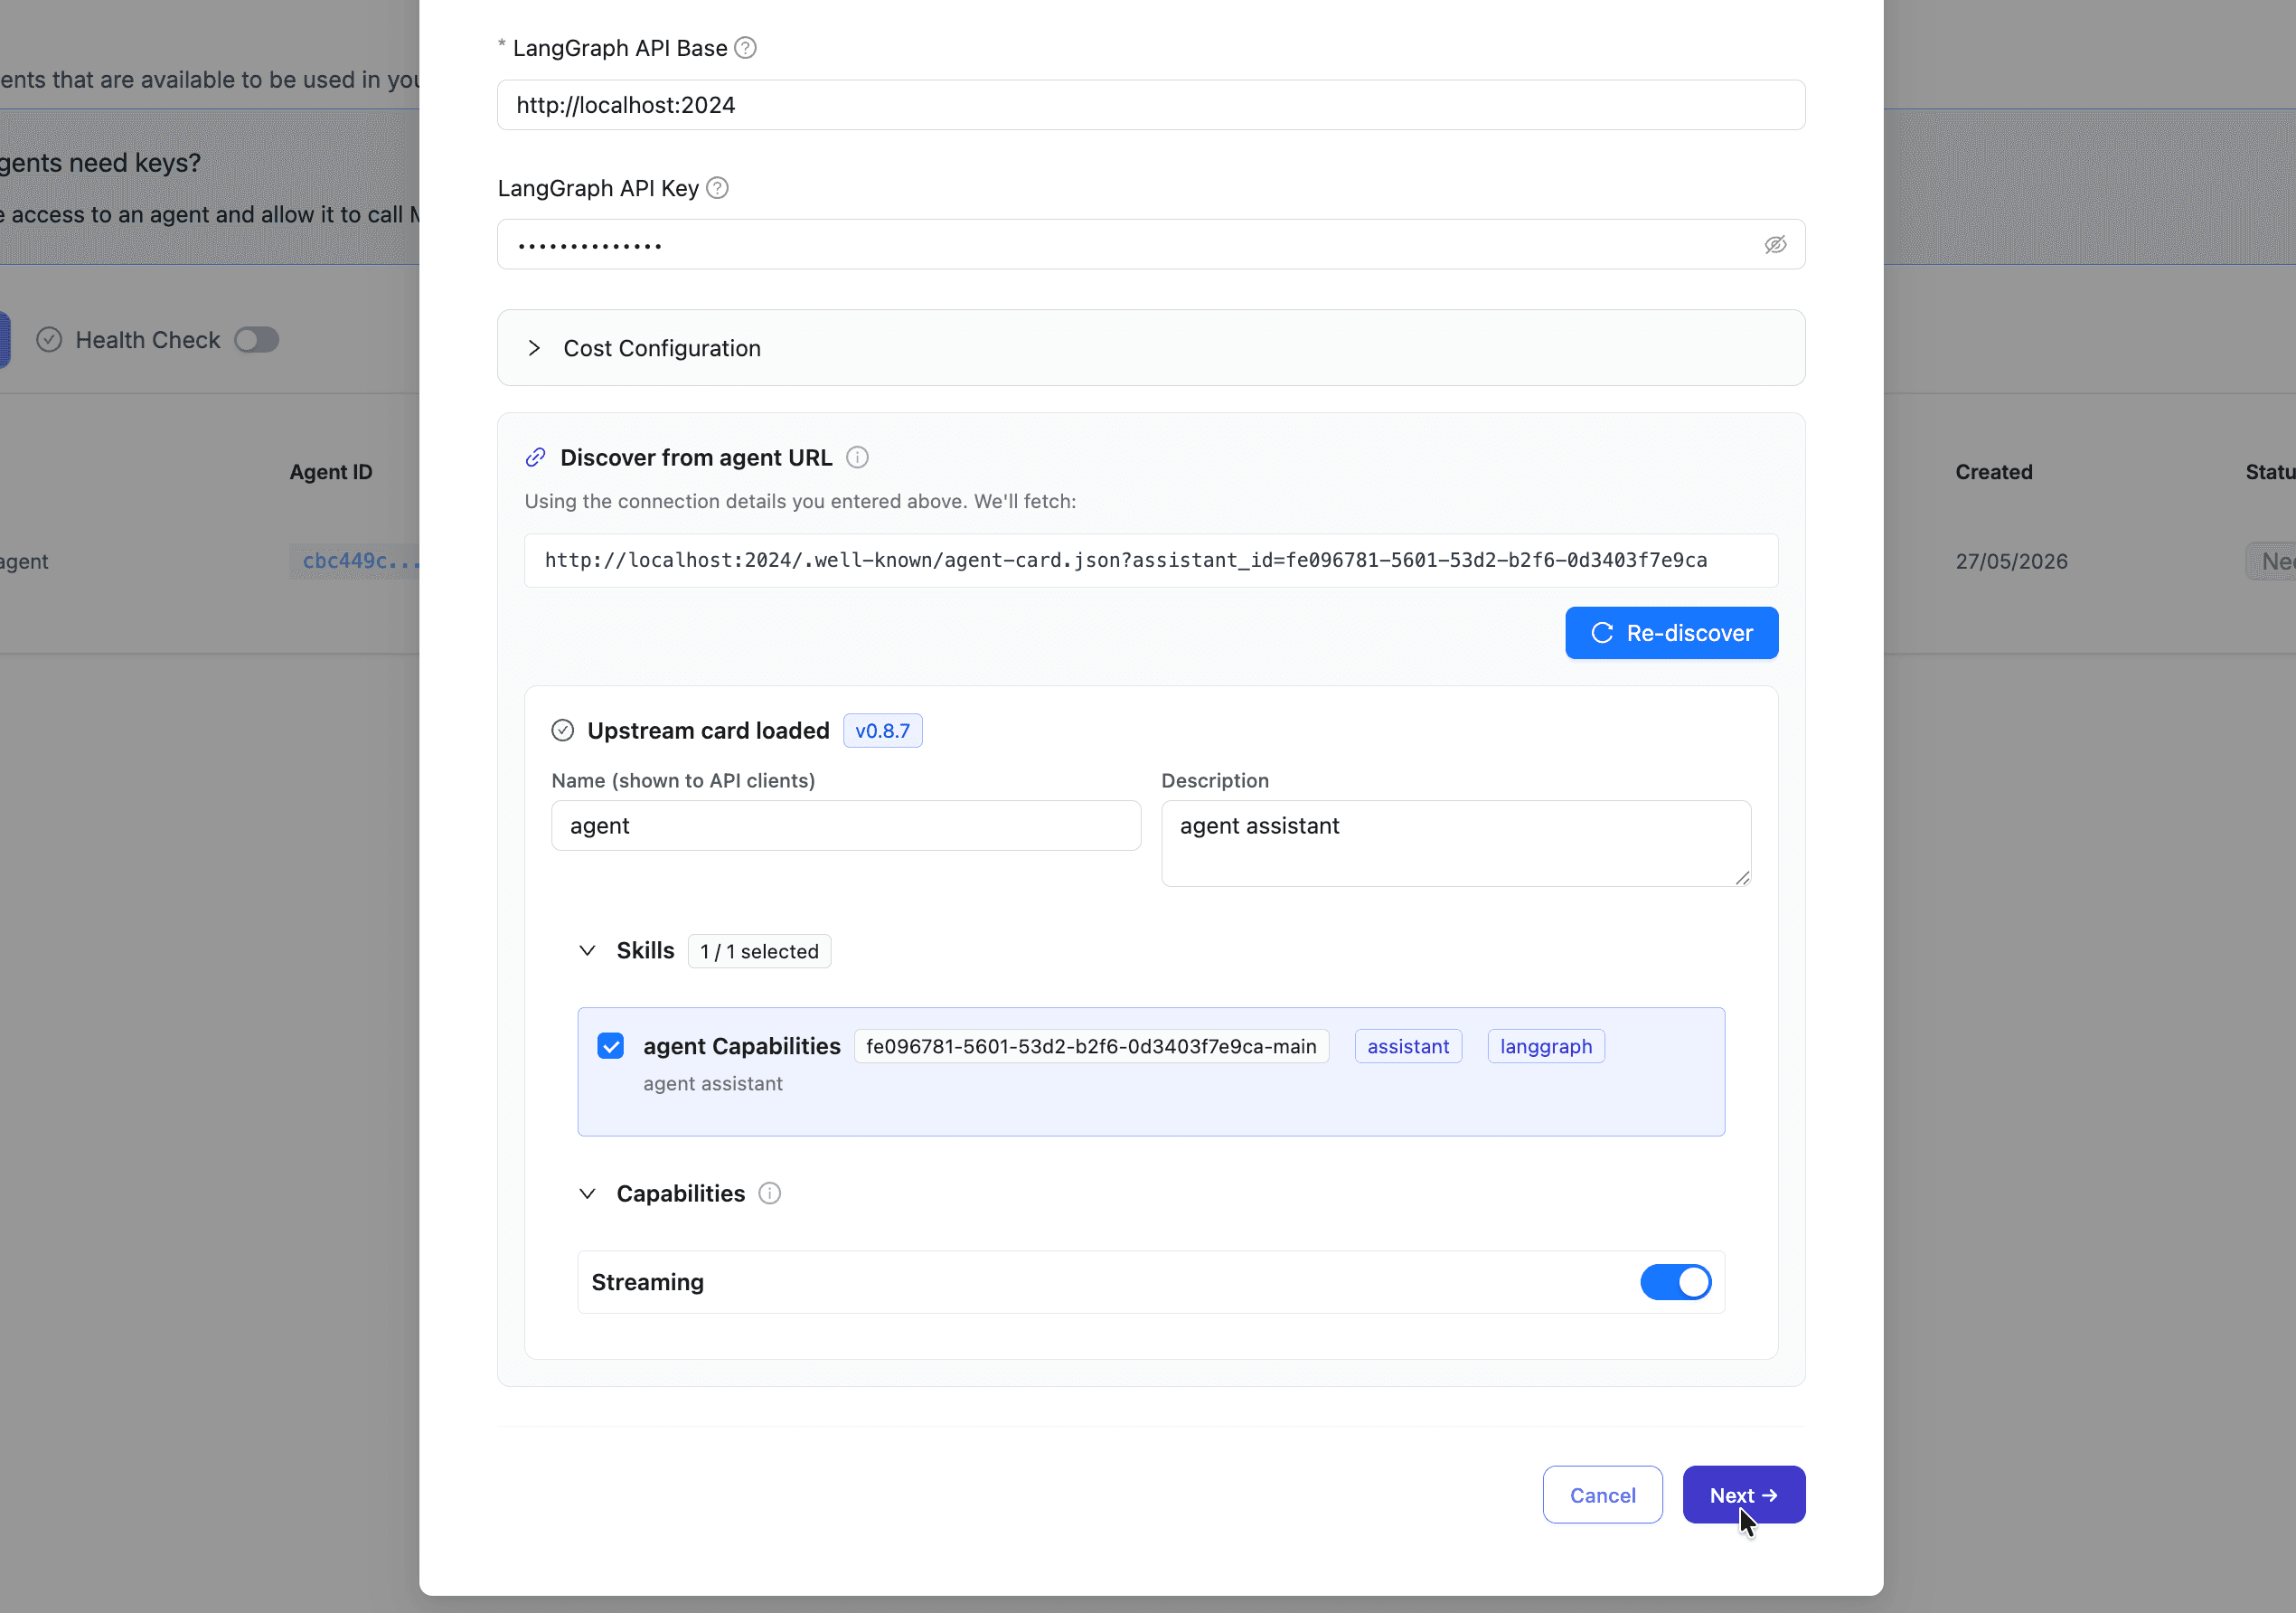
5: Save the agent
Click on Next to save. And complete the rest of the steps
6: Verify the served card
From your terminal, fetch the agent card LiteLLM is serving:
curl -H "Authorization: Bearer sk-1234" \
  http://localhost:4000/a2a/{agent_id}/.well-known/agent.json | jq
You should see the card you saved, with:
supportedInterfaces[0].urlpointing at LiteLLM, not the upstreamsecuritySchemesshowingLiteLLMKey(HTTP bearer)- The skills you kept during registration
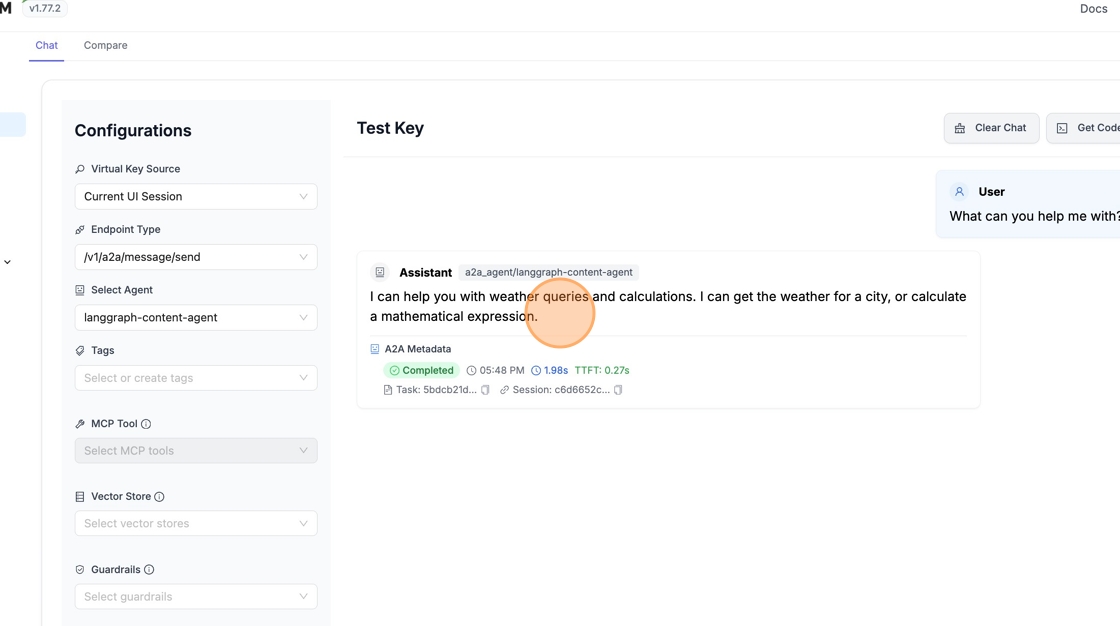
7. Test in Playground
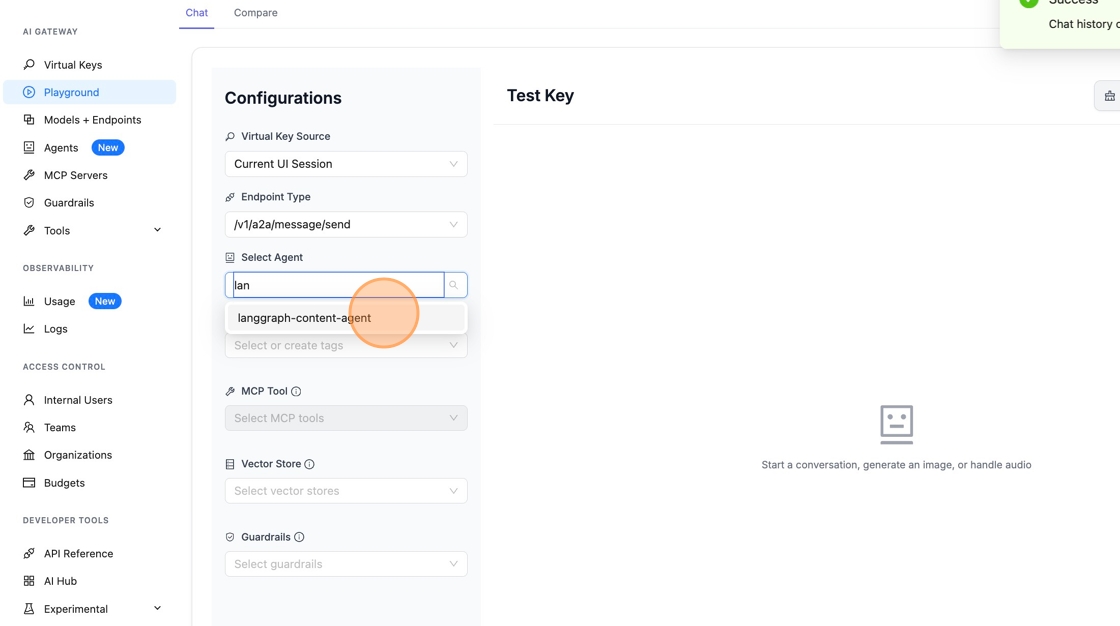
Go to "Playground" in the sidebar to test your agent. Change the endpoint type to /v1/a2a/message/send.
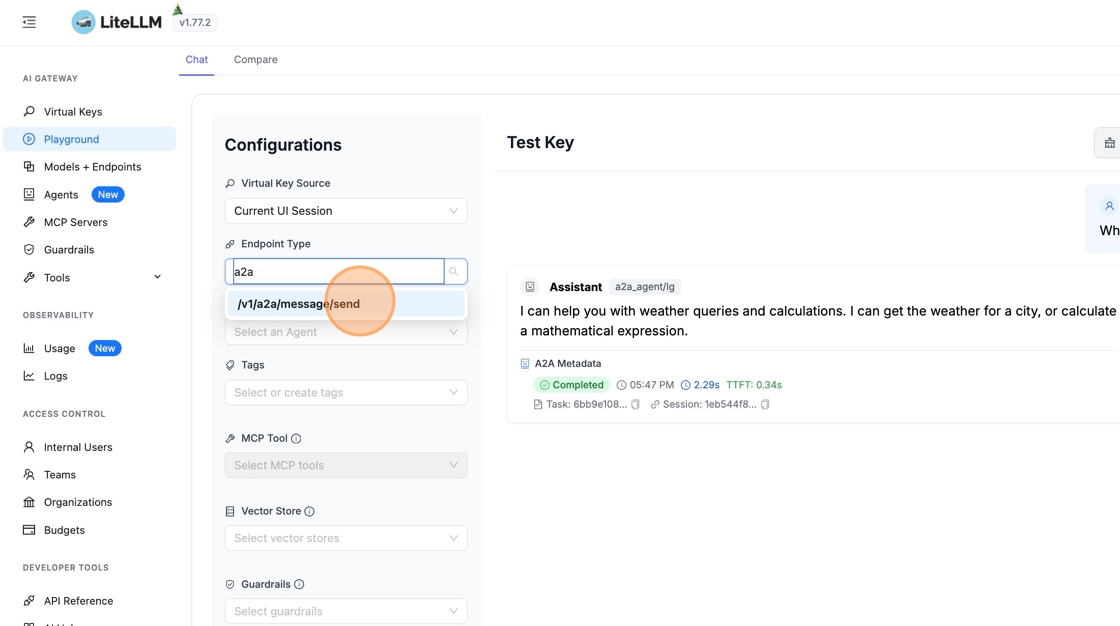
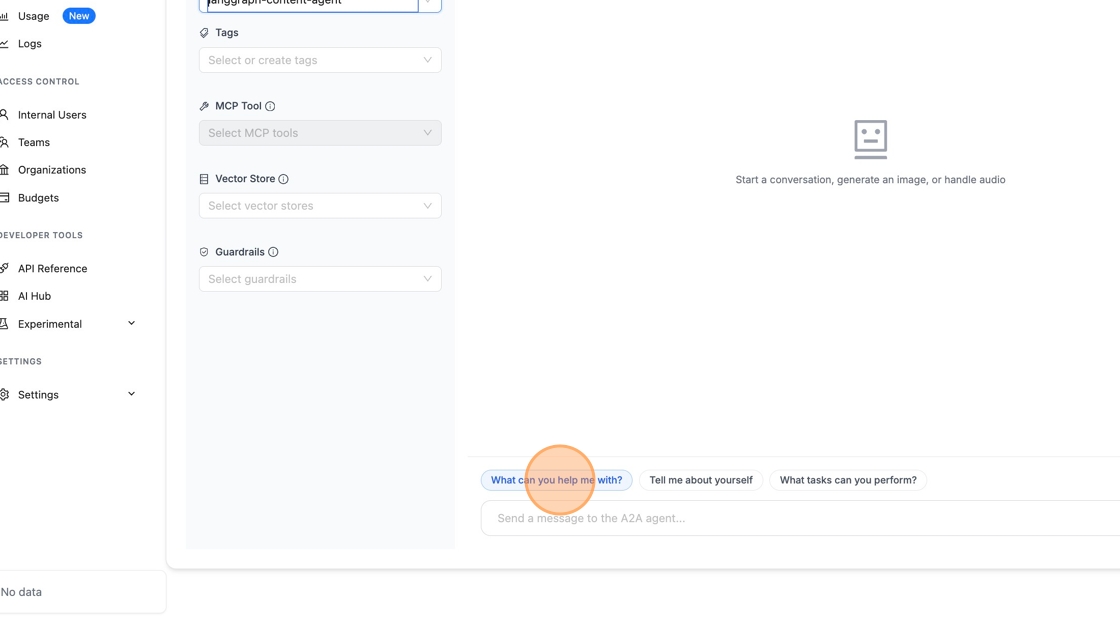
8. Select Your Agent and Send a Message
Pick your LangGraph agent from the dropdown and send a test message.
9: Invoke the agent manually
Send an A2A message/send request to the LiteLLM proxy URL:
curl -X POST http://localhost:4000/a2a/{agent_id} \
  -H "Authorization: Bearer sk-1234" \
  -H "Content-Type: application/json" \
  -H "Accept: application/json" \
  -d '{
    "jsonrpc": "2.0",
    "id": "req-1",
    "method": "message/send",
    "params": {
      "message": {
        "messageId": "msg-001",
        "role": "user",
        "parts": [{"kind": "text", "text": "My order is urgent and still not delivered"}],
        "metadata": {"skillId": "triage_ticket"}
      }
    }
  }'
For streaming, use message/stream and add -N -H "Accept: text/event-stream" to the curl.
See also Invoking A2A Agents for SDK examples.