Agent Kill Switch
Store a "stop this agent" webhook on each agent and fire it from LiteLLM when the agent misbehaves.
Overview
A kill switch is an optional outbound webhook saved alongside the rest of an agent's config. It holds the endpoint, HTTP method, headers, query params, JSON body and auth that the agent's runtime expects for a shutdown call. A proxy admin fires it with a single request or from the Danger Zone on the agent's page in the Admin UI. LiteLLM only makes the webhook call; the agent stays registered and enabled on the LiteLLM side, so you decide separately whether to delete it. Every fire is written to the audit log.
Only proxy admins can set or fire a kill switch. Secrets in the auth block (bearer tokens, API keys, basic auth passwords) are redacted to REDACTED_BY_LITELM on every read. Non admin readers of an agent see kill_switch: null.
Configure a kill switch
- UI
- REST API
- config.yaml
- Go to Agents in the LiteLLM dashboard.
- Create or edit an agent.
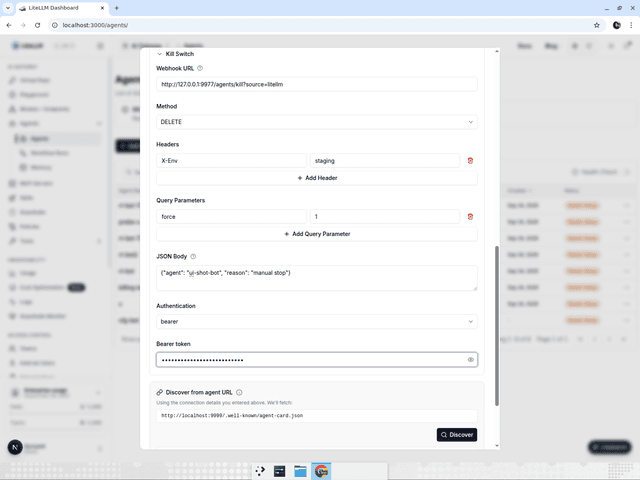
- Open the Kill switch panel and fill in the URL, method, headers, query params, JSON body and auth type.
- Save. The agent detail page now shows the configured endpoint and method, with the credential redacted.
curl -X POST http://localhost:4000/v1/agents \
  -H "Authorization: Bearer sk-admin" \
  -H "Content-Type: application/json" \
  -d '{
    "agent_name": "inventory-agent",
    "agent_card_params": { ... },
    "kill_switch": {
      "url": "https://agents.internal.example.com/agents/inventory/kill?source=litellm",
      "method": "DELETE",
      "headers": {"X-Env": "prod"},
      "query_params": {"force": "1"},
      "body": {"agent": "inventory-agent", "reason": "manual stop"},
      "auth": {"type": "bearer", "token": "ops-secret-token"}
    }
  }'
The same field works on PATCH /v1/agents/{agent_id} and PUT /v1/agents/{agent_id}. A PATCH that omits kill_switch leaves the stored one alone, while "kill_switch": null removes it. When you PATCH an agent whose auth was returned redacted, send REDACTED_BY_LITELM back as the token and the stored secret is kept.
agents:
  - agent_name: inventory-agent
    agent_card_params:
      name: "Inventory Agent"
      url: "http://localhost:10001"
      protocolVersion: "1.0"
    kill_switch:
      url: "https://agents.internal.example.com/agents/inventory/kill"
      method: POST
      headers:
        X-Env: prod
      body:
        agent: inventory-agent
      auth:
        type: basic
        username: ops
        password: os.environ/AGENT_KILL_SWITCH_PASSWORD
Fields
| Field | Required | Description |
|---|---|---|
url | yes | Absolute http or https URL. Its own query string is kept and merged with query_params |
method | no | POST (default), PUT, PATCH, DELETE or GET |
headers | no | Static headers sent on every fire. Auth headers win on a name conflict |
query_params | no | Query params appended to the URL |
body | no | JSON object sent as the request body |
auth | no | One of the auth shapes below |
The auth block is a tagged union on type. {"type": "bearer", "token": "..."} sends Authorization: Bearer <token>. {"type": "api_key", "header_name": "X-API-Key", "key": "..."} sends the key under the header you name. {"type": "basic", "username": "...", "password": "..."} sends an Authorization: Basic header. Leave auth out for an unauthenticated endpoint.
Fire the kill switch
- UI
- REST API
Open the agent from the Agents list and scroll to the Danger Zone at the bottom of the page. It is only rendered for proxy admins, and it warns that firing stops the agent's upstream runtime and can cause an outage.
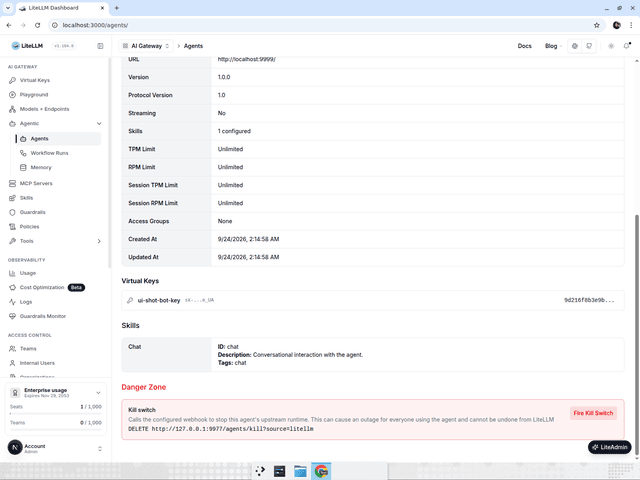
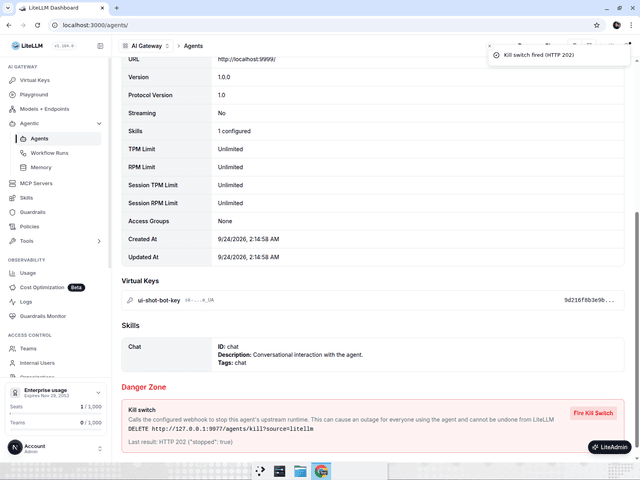
Click Fire Kill Switch, type the agent's exact name to enable the Fire button, and confirm. The section then shows the status code and the first part of the response the webhook returned.
curl -X POST http://localhost:4000/v1/agents/{agent_id}/kill_switch \
  -H "Authorization: Bearer sk-admin"
{
  "agent_id": "41c54c9e-4327-47c0-8582-cbe848cc6131",
  "url": "https://agents.internal.example.com/agents/inventory/kill",
  "method": "DELETE",
  "status_code": 202,
  "response_body": "{\"stopped\": true}",
  "error": null
}
LiteLLM sends exactly what was configured, with a 10 second timeout and without following redirects. A 2xx from the webhook returns 200 with the receiver's status code and up to the first 2000 characters of its body. A non 2xx response or a transport failure returns 502 with the same shape so you can see what the receiver said. Firing an agent that has no kill switch returns 400, an unknown agent returns 404, and a non admin key gets 403 before anything is sent.
The response body is shown to the admin who fired the switch, so point the webhook at an endpoint that does not echo secrets.
Audit log
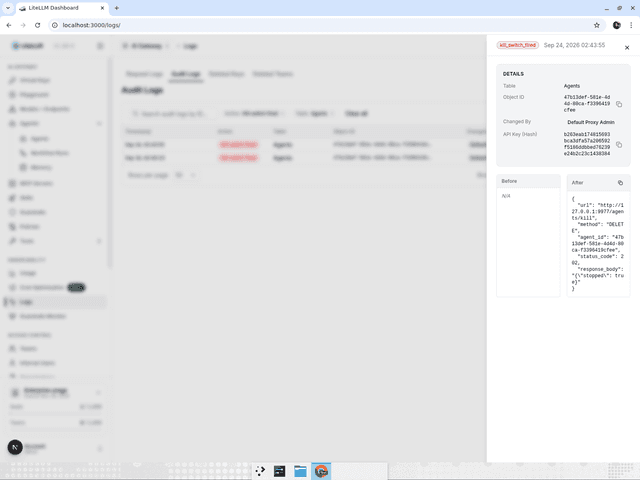
Every fire that reaches the webhook, whether it came back 2xx or not, writes a kill_switch_fired row to the audit log against the LiteLLM_AgentsTable table with the agent id as the object. The row records who fired it (user and key), the target URL, method, the status code and truncated body the webhook returned, and the transport error if there was one. The kill switch config itself, including auth, custom headers, body and query params, is never written to the row. Audit logging needs litellm_settings.store_audit_logs: true, see Audit Logs.
In the Admin UI, open Logs, switch to the Audit Logs tab and filter the action to Kill switch fired (or the table to Agents). Click a row to see the full payload.